FAQ
- Digital pressure gauge troubleshooting and performance analysis?
Precautions for field use
1, digital pressure gauge field use conditions should meet the requirements of the instrument technical parameters. The correct selection of the instrument range, the measured pressure can not exceed the measuring upper and lower limits of the instrument, should leave sufficient overpressure safety margin
2, the temperature of the measured medium of the pressure gauge shall not exceed the operating temperature of the instrument, and the sealing and vibration resistance of the instrument should be ensured when used in corrosion and vibration places.
3, the digital precision pressure gauge is vertically downward direct installation type, can be directly installed on the pressure interface of the pipeline to be measured, installation to avoid the formation of a "closed pressure" between the instrument connection thread and the valve in front of the table (observe the value, pay attention to the pressure response time), if the formation of the pressure, should be eliminated in time, otherwise it will cause damage to the measuring element, media leakage.
Operating Instructions
The sensor and display processing part of the digital pressure gauge adopts an integrated design structure, which is easy to use. The digital pressure gauge is directly connected to the measured mechanism using threads, and there is no requirement for the placement angle of the digital pressure gauge. The approximate pressure range of the target to be measured should be estimated to avoid mechanical damage to the sensor due to excessive pressure exceeding the measurement range. The pressure response time of the digital pressure gauge is 2S.
Troubleshooting and troubleshooting
Digital pressure gauges are mechanical and electrical products. During transportation and use, due to environmental interference and improper human operation, the instrument may not work and display normally. For simple faults, users can eliminate them by themselves, and other faults need to be returned to the manufacturer for maintenance. The list below indicates the faults and their troubleshooting methods.
Trouble shooting method of digital pressure gauge
1. There is no font on the screen to replace the battery
2. The font does not change when the pressure increases, take out the battery, wait for 30 seconds, and then reinstall it
3. If the font is non-digital, the liquid crystal is damaged and returned to the factory for repair.
4. The value is obviously inaccurate, the sensor is damaged, return to the factory for repair.
5. If the accuracy changes, return to the factory for recalibration
Performance analysis of intelligent digital pressure gauge!
1. Economic benefit analysis
After long-term operation, the intelligent digital pressure gauge shows that the failure rate is low, the maintenance cost is less, and the operating cost is reduced. Maintenance workload is small, mainly for regular check and verification. Even if there is a problem, you can easily find the problem through hand exercises to reduce unnecessary waste. The price of intelligent digital pressure gauge is relatively higher than that of ordinary pressure gauge, although it increases the cost, but its service life, accuracy grade and so on are much higher than that of traditional pressure gauges.
2. Analysis of technological advancement
The intelligent digital pressure gauge has few moving parts, small maintenance workload, high precision, reliable operation, convenient setting, correction and debugging through hand operation, with strong operability and compatibility, easy debugging, multi-parameter measurement, wide measurement range.
3. Precautions
The intelligent digital pressure gauge must be consistent with the on-site installation position during indoor verification, otherwise a large zero error will be generated.
4. Closing remarks
After long-term use by customers, intelligent digital pressure gauges have a wide range of uses in industry, petrochemical and other fields, and it is also an inevitable trend in the future development of field instruments. It is of great significance to save and reduce cost and improve economic benefit.
Contact:

- How to choose the most suitable pressure transmitter?
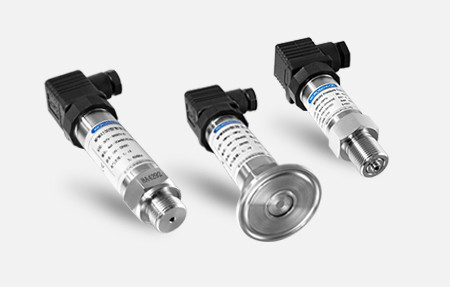
Many industries are gradually using electronic pressure gauges, which is what we usually call pressure transmitters, but due to the working environment, media, media temperature and so on, we must consider these issues when choosing pressure transmitters. Now I will talk about the purchase of pressure transmitters.
1, liquid material
We have to consider the pressure transducer measured by the medium, the general pressure transmitter contact medium part of the material used is 316 stainless steel, if your medium is not corrosive to 316 stainless steel, then basically all the pressure transmitters are suitable for your measurement of medium pressure. If your medium is corrosive to 316 stainless steel, then we must use a chemical seal, so that not only can measure the pressure of the medium, but also can effectively prevent the contact between the medium and the liquid part of the pressure transmitter, so as to protect the pressure transmitter and extend the life of the pressure transmitter.
2, accuracy level
Each kind of electronic measuring meter will have accuracy errors, but because the accuracy level of each country is not the same, for example, the accuracy of China and the United States and other countries is the best part of the linearity of the sensor, that is, the accuracy of the measurement range we usually say between 10% and 90%; The accuracy of the European target is the worst part of linearity, that is, we usually say that the accuracy of the measurement is between 0 and 10% and 90% to 100%. If the accuracy of the European target is 1%, the accuracy of the target in China is 0.5%, and the accuracy level of the pressure transmitter developed by Shanghai Yongwei Automatic Control Complete Equipment Co., Ltd. is 0.2.
3. Range range
Generally, the maximum range measured by the sensor is 70% of the full scale of the sensor is the best, that is, to measure the pressure of 70bar, we choose the range of the pressure transmitter should choose 100bar.
4, output signal
At present, due to the needs of various collection, there are many kinds of output signals of pressure transmitters on the market, mainly 4~20mA,0~20mA,0~10V,0~5V, etc., but the more commonly used are 4~20mA and 0~10V two, in these output signals I mentioned above, only 4~20mA is a two-wire system (we say the output is several The wire system does not include ground or shielded wires), and the others are three-wire systems.
5, medium temperature
Because the signal of the pressure transmitter is partially converted through the electronic circuit, under normal circumstances, the temperature of the measuring medium of the pressure transmitter is -30 to +100 degrees, if the temperature is too high, we generally use the condensation bend to cool the medium, so that the cost of the manufacturer specially for you to produce a high temperature pressure transmitter will be reduced a lot.
6. Measure the medium
Generally, we measure a relatively clean fluid, we directly use a standard pressure transmitter on it, if the medium you are measuring is easy to crystallize or sticky, we generally use an external diaphragm or chemical seal together, which will effectively prevent the medium from blocking the pressure measurement hole.
7. Others
After determining the above five parameters, also confirm the process connection interface of your pressure transmitter and the supply voltage of the pressure transmitter; If it is used in special occasions, explosion protection and protection level should be considered.
Contact:

- Analysis and Solution of Common Faults of Intelligent Electromagnetic Flowmeter
Smart electromagnetic flowmeter is a speed instrument. In addition to measuring the volume flow of general conductive liquids, it can also be used to measure the volume flow of strong corrosive liquids such as strong acids and alkalis, and uniform liquid-solid two-phase suspension liquids such as mud, ore pulp, and paper pulp. Widely used in petroleum, chemical industry, metallurgy, light textile, papermaking, environmental protection, food and other industrial sectors and municipal management, water conservancy construction, river dredging and other fields of flow measurement. Common faults, some are caused by damage to the components of the instrument itself, and some are caused by improper selection, improper installation, environmental conditions, fluid characteristics and other factors, such as display fluctuations, decreased accuracy, and even instrument damage. It can generally be divided into two types: failures that occur during installation and debugging (debugging period failures) and failures that occur during normal operation (running period failures).
(1) Faults in the debugging period Debugging is expected that faults generally appear in the stage of instrument installation and debugging. Once eliminated, they will generally not reappear under the same conditions in the future. Common failures during the commissioning period are generally caused by improper installation, environmental interference, and influence of fluid characteristics.
1) In terms of installation, it is usually caused by the incorrect installation position of the smart electromagnetic flowmeter sensor. Commonly, such as installing the sensor at the highest point of the piping system where gas is easy to accumulate; or installing it on a vertical pipe from top to bottom, there may be discharge Empty; or there is no back pressure behind the sensor, and the fluid is directly discharged into the atmosphere to form a part of the measuring tube.
2) The environmental aspect is usually mainly the interference of stray current in the pipeline, the interference of strong electromagnetic waves in the space, and the interference of the magnetic field of large motors. Pipeline stray current interference usually takes a good separate grounding protection to obtain satisfactory results, but if encountering strong stray currents such as electrolytic workshop pipelines, sometimes the peak value of the AC potential induced on the two electrodes can be as high as The flow sensor is insulated from the pipe, etc. Space electromagnetic wave interference is generally introduced through signal cables, and is usually protected by single-layer or multi-layer shielding.
3) In terms of fluid, evenly distributed tiny bubbles in the measured liquid usually do not affect the normal operation of the electromagnetic flow meter, but as the bubbles increase, the output signal of the meter will fluctuate. If the bubbles are large enough to cover the entire electrode surface, As the air bubbles flow through the electrode, the electrode circuit will be momentarily disconnected, causing greater fluctuations in the output signal.
When the electromagnetic flow meters with low frequency square wave excitation measures the slurry with too much solid content, it will also generate slurry noise, which will cause the output signal to fluctuate.
When measuring mixed media, if the flow sensor is used for measurement before the mixing is not uniform, the output signal will also fluctuate.
Improper selection of the electrode material and the measured medium will also affect the normal measurement due to chemical action or polarization.
(2) Faults during the operation period Faults during the operation period are faults that occur after the intelligent electromagnetic flow meter has been debugged and operated normally for a period of time. Common faults during the operation period are generally caused by factors such as the adhesion layer on the inner wall of the flow sensor, lightning strikes, and changes in environmental conditions.
1) Adhesion layer on the inner wall of the sensor As electromagnetic flowmeters are often used to measure dirty fluids, after a period of operation, an adhesion layer will often accumulate on the inner wall of the sensor and cause failure. These failures are often caused by the conductivity of the adhesion layer being too large or too small. If the attachment is an insulating layer, the electrode circuit will be disconnected and the meter will not work normally; if the conductivity of the adhesion layer is significantly higher than that of the fluid, the electrode circuit will be short-circuited and the meter will not work normally. Therefore, the attached scaling layer in the measuring tube of the electromagnetic flowmeter should be removed in time.
2) Lightning strike Lightning strike is easy to induce high voltage and surge current in the instrument circuit, which will damage the instrument. It is mainly introduced through the power line or the excitation coil or the flow signal line between the sensor and the converter, especially from the control room power line, which accounts for the vast majority.
3) Changes in environmental conditions During commissioning, because the environmental conditions are still good (for example, there is no interference source) the flowmeter works normally, and it is often easy to ignore the installation conditions at this time (for example, the grounding is not very good). In this case, once the environmental conditions change, the operation During this period, new interference sources (such as electric welding on the pipeline near the flowmeter, large transformers installed nearby, etc.) will interfere with the normal operation of the instrument, and the output and output signals of the flowmeter will fluctuate.
Contact:

- How to choose a pressure transmitter type?
There is a given continuous functional relationship (usually a linear function) between the output signal of the pressure transmitter and the pressure variable. In order to ensure that the transmitter you choose meets the requirements of the site, there are several points to pay attention to when selecting the model:
1. Types of pressure measurement: pressure types mainly include gauge pressure, absolute pressure, differential pressure, etc.; gauge pressure refers to the pressure that is less than or greater than atmospheric pressure based on atmospheric pressure; absolute pressure refers to the absolute pressure zero position as the reference , the pressure above the absolute pressure zero; differential pressure refers to the difference between two pressures.
2. Accuracy level: The measurement error of the transmitter is divided according to the accuracy level. In the actual use process, it is selected according to the demand for measurement error and based on the principle of applicable economy.
3. Maximum overload of the system: The maximum overload of the system should be less than the overload protection limit of the transmitter, otherwise it will affect the service life of the product or even damage the product. The overload protection of 2 times the measuring range is the standard equipment of our company's products (it can also be customized according to customer requirements).

4. Measuring range: Generally, the actual measured pressure is 80% of the measuring range.
5. Working temperature range: The temperature of the measuring medium should be maintained within the temperature range where the pressure transmitter can work normally. If the temperature exceeds the applicable range, the error will become large and the service life of the instrument will be shortened accordingly; During the production process of the transmitter, the temperature effect will be measured and compensated to ensure that the measurement error of the product affected by the temperature is within the range of accuracy requirements. In places where the temperature is high, you can consider choosing a high-temperature pressure transmitter or adopting auxiliary cooling methods such as installing a condenser tube (device) and a radiator.
6. Compatibility between measuring medium and contacting material: In some application places, because the measuring medium is corrosive, it is necessary to use materials compatible with the measuring medium or perform special process treatment to ensure that the transmitter is not damaged.
7. Pressure interface method: Generally, the threaded connection (M20×1.5) is the standard interface method for products.
8. Power supply and output signal: usually 24V power supply, output signal includes 4~20mADC, 0~5VDC, 1~5VDC, 0~10VDC, etc.
The selection of pressure transmitters is mainly based on the type of measured pressure, accuracy level, and measurement range. After determining the manufacturer and model of the transmitter used, determine the range of the transmitter according to the requirements of use. When selecting the range, the principles of adjustable range up and down, highest precision, and suitable price should be considered comprehensively.
Contact:

- What is the working principle of guided wave radar level gauge?
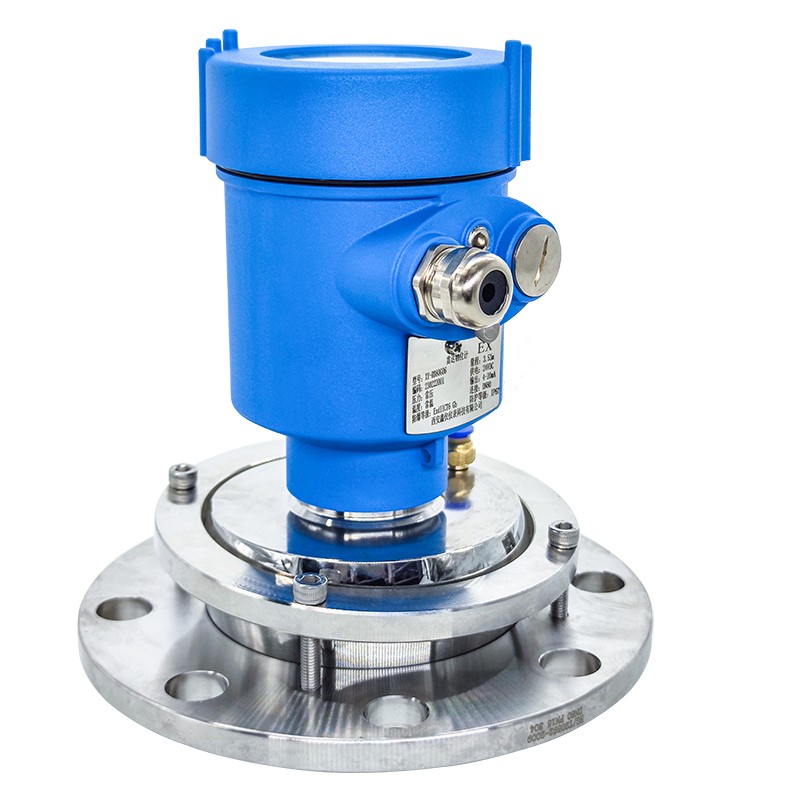
Radar level meter is more common in the level meter, guided wave radar level meter is the star of the radar level meter, it not only looks good, but also has good performance, and high cost performance, so it is very popular, but when it comes to the working principle of guided wave radar level meter, I believe that many people do not understand, including friends who have used it for a long time. So, let's tell you about the working principle of this radar level meter.
Guided wave radar level meter is based on the principle of time domain reflectometry (TDR). The radar level meter based on high frequency oscillator emits electromagnetic pulse, which propagates down the guided wave cable or the guided wave pole. When the surface of the measured medium is encountered, part of the electromagnetic pulse of the radar level meter is reflected back to form an echo. By measuring the running time of the emitted and reflected waves, the formula for calculating the liquid level height is returned to the pulse transmitter t=2d/c along the same path.
Measuring instruments based on the time travel principle are the working principles of guided wave radar level gauges. Radar waves run at the speed of light, and the running time can be converted into a level signal by electronic components. The probe emits a high-frequency pulse that propagates along the cable probe. When the pulse hits the surface of the material, it is reflected back to a receiver in the instrument, which converts the distance signal into a level signal.

Specifically, the antenna of the guided wave radar sensor emits electromagnetic wave signals in the form of beams, and the emitted waves are reflected on the surface of the measured material, and the reflected echo signals are still received by the antenna. Ultrasonic sampling is used for each point in the transmitted and reflected beams. After being processed by the intelligent processor, the signal gets the distance between the medium and the probe, and is sent to the terminal display for display, alarm, operation, etc.
The relative permittivity of a medium is a physical quantity representing the polarization of the medium, which is determined by the properties of the medium itself. Therefore, different media have different dielectric constants. The reflectivity of the high-frequency pulse signal is directly affected by the reflectivity of the high-frequency pulse signal. When the electromagnetic pulse reaches the surface of the medium, the electromagnetic wave is reflected and refracted.
The larger the relative permittivity, the smaller the reflection loss, and the smaller the relative permittivity, the greater the emission loss and the more serious the signal attenuation. If the conductivity of the measured medium is greater than 10mS/cm, it will all be reflected back, and the stronger the wave signal is. An excessively small relative permittivity will result in extreme attenuation of the signal. Therefore, each guided wave radar level gauge has a minimum relative dielectric constant to ensure the normal use of the radar level gauge. Different companies have different structural designs for guided wave radar level gauges, and have different requirements for the minimum relative permittivity.
Guided wave radar liquid level meter signal energy is small, can provide a fast and efficient channel from signal to liquid transmission, signal attenuation is kept to a minimum, so can be used to measure the medium level of the medium constant is very low; In addition, due to the small energy consumption of the guided wave radar, the power supply circuit is not a separate AC power supply, which greatly saves the installation cost.
Contact:

- How to selection the ultrasonic liquid level gauge?
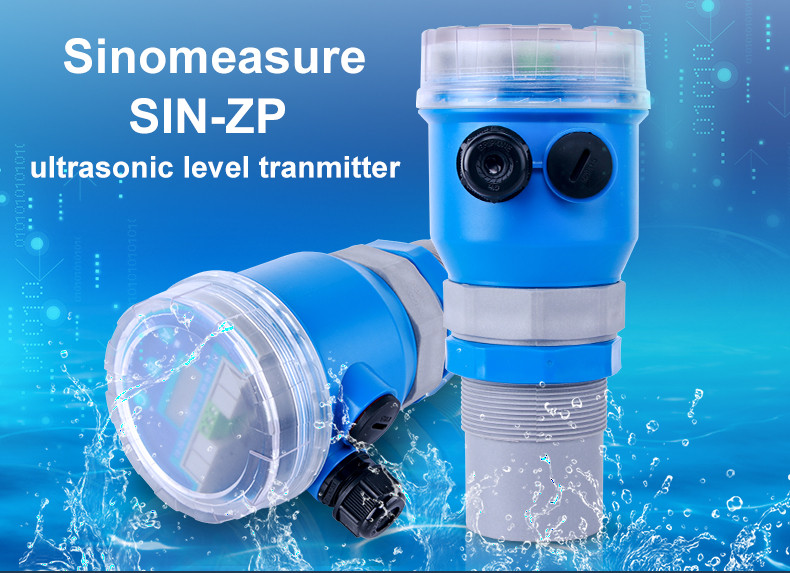
Ultrasonic liquid level gauge is a non-contact measuring instrument. It measures the distance from the instrument to the liquid level interface through the ultrasonic principle. According to the installation method, the ultrasonic transmission medium is divided into two types: air and the measured medium. Since the speed of sound in air is lower than that in liquid, models that transmit ultrasonic waves through the measured medium generally have higher measurement accuracy. Therefore, the difference in type selection directly has a greater impact on the measurement effect. According to the situation, ultrasonic liquid level gauge is divided into: integrated ultrasonic liquid level gauge, split type ultrasonic liquid level gauge.

Selection method of ultrasonic liquid level gauge:
1. Select according to the type of container to be tested
When the measured container is in the form of pool, tank or underground container, there is no bottom installation space. An integrated ultrasonic level gauge should be selected for installation, measurement and manipulation from the top. When the measured container is in the form of a tank or a tower, if there is an installation interface at the bottom, a split ultrasonic level gauge should be selected for bottom installation. When there is pressure in the container or there is no connection at the bottom, it is installed on the top, and both types of ultrasonic level gauges are available.
2. Select according to the ambient temperature
When the temperature of the medium in which ultrasonic waves are transmitted changes, the sound velocity of ultrasonic waves will change greatly. For example, the speed of sound increases by 30m/s when the temperature in the air rises by 50°. The specific heat capacity of the liquid is larger than that of the air, so the temperature of the liquid is less affected by the change of the ambient temperature than the air. When there is a large temperature difference between day and night or seasonal temperature changes in the measurement environment, a split type ultrasonic level gauge should be considered, and the sound wave is transmitted in the liquid medium for measurement, which has better measurement accuracy and more stable data.
Based on the above, in most cases, the split type ultrasonic liquid level gauge can obtain better measurement accuracy. But the integrated ultrasonic level gauge is more competitive in terms of cost, installation and maintenance. Therefore, when selecting a model, the requirements for alignment and cost control should be considered comprehensively.
Contact:

- How is the pressure transmitter calibrated and measured during work?
How do pressure transmitters measure during work?
Pressure transmitters play a crucial role in the industrial automation and instrumentation industries. Transmitters generally have a certain amplification effect and can also convert non electrical quantities into measurable electrical quantities. Pressure transmitters, also known as differential pressure transmitters, are generally composed of the main components of pressure transmitters, such as pressure measuring sensors, module circuits, display heads, gauge shells, and process connectors. It can convert the received gas, liquid, and other pressure signals into standard current and voltage signals for supply to secondary instruments such as indicator alarms, recorders, regulators, etc. for measurement, indication, and process regulation.
The measurement principle of a pressure transmitter is that the process pressure and reference pressure act on both ends of the integrated silicon pressure sensing element respectively, and the differential pressure causes the silicon wafer to deform (with very small displacement, only μ M-level), to enable the fully dynamic Wheatstone bridge made of semiconductor technology on a silicon chip to output a mV level voltage signal proportional to pressure under the driving of an external current source. Due to the strong nature of silicon materials, the linearity and variation indicators of the output signal are both high. During operation, the pressure transmitter converts the measured physical quantity into a mV level voltage signal and sends it to a differential amplifier with a high amplification factor that can offset temperature drift with each other.The amplified signal is transformed into a corresponding current signal through voltage and current conversion, and then subjected to nonlinear correction to generate a standard current and voltage signal that is linearly related to the input pressure.
Pressure transmitter precautions:
1.Prevent the loosening device from coming into contact with corrosive or overheated media;
2.Prevent sediment from settling inside the conduit;
3.When measuring liquid pressure, the pressure tap should be opened on the side of the process pipeline to avoid sediment accumulation;
4.When measuring gas pressure, the pressure tap should be located at the top of the process pipeline, and the transmitter should also be installed on the upper part of the process pipeline,so that accumulated liquid can easily be injected into the process pipeline;
5.The pressure pipe should be installed in a place with low temperature fluctuations;
6. When measuring steam or other high-temperature media, it is necessary to connect a condenser such as a buffer tube (coil), and the working temperature of the transmitter should not exceed the limit;
7. When freezing occurs in winter, the transmitter installed outdoors must take anti freezing measures to prevent the liquid in the pressure inlet from expanding due to freezing volume, resulting in sensor loss;
8. When measuring liquid pressure, the installation position of the transmitter should avoid liquid impact (water hammer phenomenon) to avoid damage to the sensor due to overpressure;
9. When wiring, thread the cable through a waterproof joint or flexible tube and tighten the sealing nut to prevent rainwater from leaking into the transmitter housing through the cable.

- Precautions for use and maintenance of temperature transmitters
一、What should be paid attention to when using temperature transmitters?
Connect instruments of different models according to the instructions. For explosion-proof instruments with safety spark circuits, it is necessary to carefully check for any short circuits or incorrect connections.
The input of the thermal resistance temperature transmitter is a three wire system, and the resistance of the three wires should be equal and within the same ambient temperature.
This instrument cannot be installed in hazardous areas (thermocouples and thermal resistors can be installed in hazardous areas.
The wiring of the safety spark circuit (input signal line) must have insulating sleeves or shielded wires, and be isolated from the wiring of the non safety spark circuit (power supply and output signal line) to avoid mixed contact with each other. The wiring for safety spark circuits is routed from above, while the wiring for non safety spark circuits is routed from below.
二、What issues should be noted when maintaining temperature transmitters?
In principle, it is not allowed to disassemble the components of the safety spark circuit and replace the wiring of the explosion-proof instrument. If necessary, the following points should be noted:
1.During regular inspections, the zero and range potentiometers should be adjusted as much as possible, without accidentally dropping the safety spark wiring. When conducting routine checks on other items, the input line should be disconnected.
2.To ensure safe spark characteristics, replaced components cannot be reused and should be replaced with components of the same specification.
3.When the instrument malfunctions, the power fuse should be immediately removed, and then the input line should be opened to check the insulation between the terminals. If the insulation is good, the fault should be checked again to avoid causing a short circuit.
The instrument should undergo maintenance once every six months of operation, and the instruments in operation should be kept clean and dry.
For more technical questions, please contact the staff for communication.

- How to handle problems with precision digital pressure gauges
What can be done when precision digital pressure gauges encounter problems?
The precision digital pressure gauge adopts high-precision low-power large-scale integrated circuits as the core device, mainly composed of high-precision measurement chips, battery charging protection circuits, sensors, and signal processing circuits.
Precision digital pressure gauges use microprocessors to automatically compensate and correct instrument zero drift, nonlinearity, etc., and high-performance devices such as high stability pressure sensors are used to ensure instrument accuracy and reliability. This instrument can set various functional parameters on its own, with flexible application and various functions to choose from. It can be used as a high accuracy pressure calibration standard (meter), as well as for measurement and scientific research in laboratories and on-site industries such as working instruments, power, metallurgy, petroleum, chemical, etc.
Precision digital pressure gauges can be used as high accuracy calibration standards (gauges) for the calibration and verification of pressure transmitters. A portable instrument for both AC and DC purposes, capable of measuring pressure and current, displayed on an LCD, and equipped with a 24VDC output. However, there are usually some malfunctions encountered during use.
1. The instrument pointer will not zero after the pipeline or equipment is depressurized?
Solution: Add isolation plates to solve the problem of the instrument not returning to zero position.
2. In addition, the fan-shaped teeth of the instrument panel may experience wear after a period of operation?
Solution: Widening the detached fan-shaped teeth to solve the contact surface of the instrument and resist wear to achieve the function of extending service life.
3. Due to the instantaneous increase in pulse of the measured medium, the instrument pointer is pushed below the stop?
Solution: The movement of the instrument is the heart component of the pressure gauge, and more than 80% of instrument damage is caused by movement damage, which makes the instrument unusable. By adding limit screws to the existing movement, the problem of instrument jumping has been solved.
The above is all the sharing today about how to handle problems with precision digital pressure gauges. We hope it will be helpful for everyone to use this device in the future. For more detailed information, please refer to the contact information below.

- Precautions for stainless steel shock resistant pressure gauges
Stainless steel shock resistant pressure gauge is a pressure gauge that can operate normally in vibration environments and pulsating media. The shell is filled with damping fluid to alleviate external environmental vibration. Damper screws are installed at the interface, and the pulsating medium is filtered through the damping screws before entering the elastic sensitive element, to avoid damage to the elastic element, ensure the normal operation of the seismic pressure gauge, and extend its service life!
Installation precautions for stainless steel shock resistant pressure gauges:
1. The ambient temperature for instrument use is -40~70 ℃, and the relative humidity is not more than 80%. If it deviates from the normal operating temperature by 205 ℃, additional temperature errors must be included.
2. The instrument must be installed vertically, striving to maintain the same level as the measurement point. If the difference is too high, it should be included in the additional error caused by the liquid column, and it may not be necessary to consider when measuring gas. When installing, block the explosion-proof port at the back of the watch case to avoid affecting its explosion-proof performance.
3. The measurement range for normal use of the instrument: should not exceed 3/4 of the upper measurement limit under static pressure, and should not exceed 2/3 of the upper measurement limit under fluctuation. Under the above two pressure conditions, the low measurement of the large pressure gauge should not be lower than 1/3 of the lower limit. When measuring vacuum, all vacuum parts should be used.
4.When encountering malfunctions such as malfunctioning instrument pointers, loose internal components, or inability to function properly during use, maintenance should be carried out or the manufacturer should be contacted for repair.
5. Instruments should avoid vibration and collision to avoid damage.
Stainless steel shock resistant pressure gauges are suitable for situations where the pressure of the tested medium undergoes strong pulse changes or pressure shocks, frequently sudden unloading in production processes, and places with high environmental vibrations. The instrument can measure the average value of gas and liquid pulsation pressure to overcome the damage caused by strong medium pulses and environmental vibrations, and ensure the accuracy of readings. The parts are made of corrosion-resistant stainless steel and corrosion-resistant alloy materials, which give the instrument good corrosion resistance and can be widely used in the petroleum, chemical, mining, machinery, power, and food industries. Directly measure the pressure of non crystalline, corrosive gases and liquids.

- Precautions for using piston pressure gauges
Apiston pressure gauge is a common pressure measuring device used to measure pressure in fluids or gases. It consists of a cylindrical container and a piston, and the pressure can be determined by observing the position of the piston. The working principle is based on Boyle's law, which states that there is an inverse relationship between pressure and volume. When the fluid to be tested enters the pressure gauge, a force is applied to the piston, which is proportional to the pressure of the fluid. The greater the force on the piston, the higher the pressure.
In the pressure gauge, there is a scale inside the cylindrical container that is used to read the pressure value corresponding to the piston position. The greater the distance the piston moves upwards, the higher the pressure. Usually, these scales are marked in standard units such as pascals or bars.
To use a pressure gauge, it is necessary to first connect it to the system to be tested and ensure a good seal with the measured fluid. Then, open the valve of the pressure gauge to allow fluid to enter the inside of the gauge. The pressure of the fluid acts on the piston, causing it to rise to the corresponding position. By reading the position of the piston on the scale, the pressure value can be obtained.
The piston pressure gauge has some advantages. Firstly, they are relatively simple and easy to use, without the need for complex electronic or mechanical devices. Secondly, they are usually more cost-effective than other types of pressure gauges. In addition, pressure gauges can measure under various environmental conditions, including high temperature and high pressure environments. In the industrial field, it is commonly used to measure the pressure of liquids or gases in pipelines, containers, and equipment. For example, in the petroleum and chemical industries, it can be used to monitor pressure changes in oil and gas pipelines to ensure safe operation. In the pharmaceutical and food industries, it can be used to detect process pressure during production to ensure product quality and safety.
Piston pressure gauge is a simple and practical pressure measuring device that determines the pressure level by observing the position of the piston. It is widely used in many applications, but attention needs to be paid to its sealing and maintenance to ensure accuracy and reliability.

- Working principle of pressure gauge calibrator
During long-term use, pressure gauges may experience measurement errors due to fatigue of elastic components, wear of transmission mechanisms, and chemical corrosion. Therefore, it is necessary to regularly calibrate the instruments, and new instruments should also be calibrated before installation and use to more appropriately estimate the reliability of the instrument's indicated values. The most commonly used method currently is the comparison method, which uses instruments such as pressure gauge calibrators and precision pressure gauges. So it is crucial to understand the principle of a pressure gauge calibrator and how to use it to calibrate pressure gauges in daily production.
一、Working principle of pressure gauge calibrator
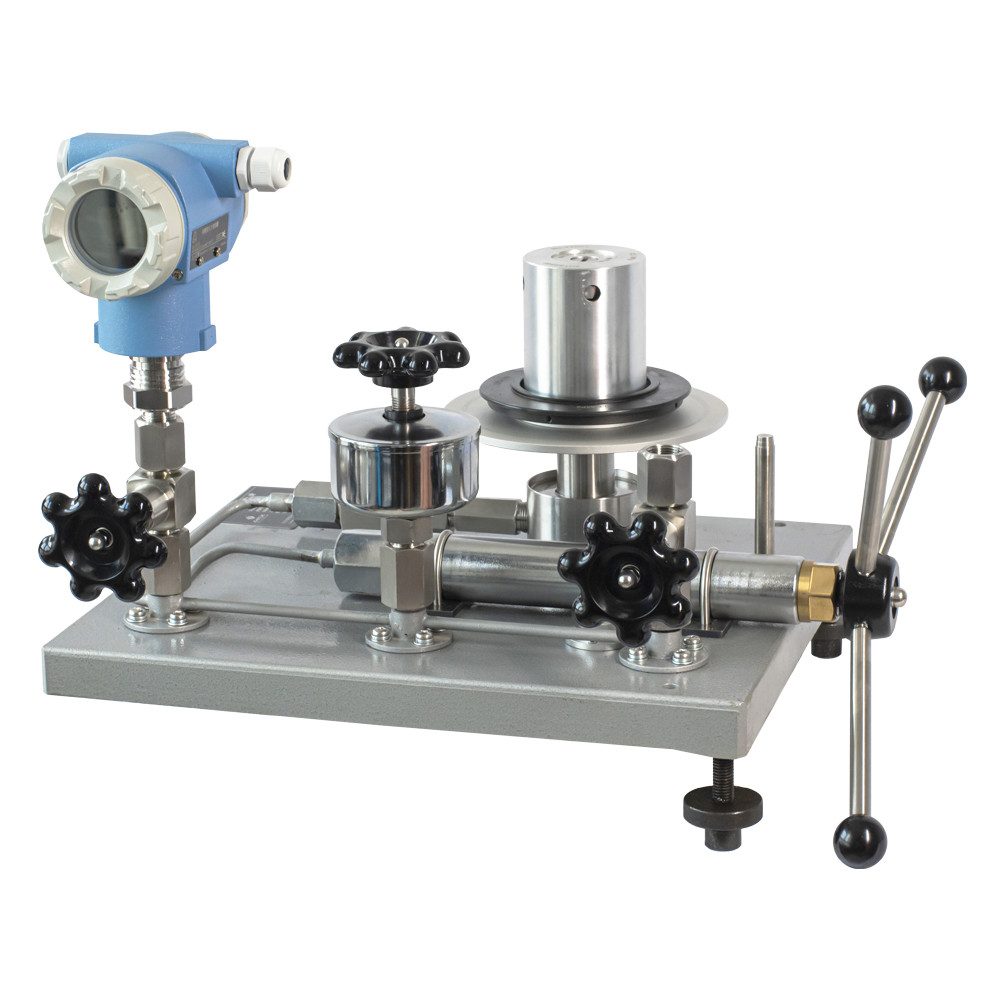
The pressure gauge calibrator is filled with transformer oil (below 6MPa) or castor oil in a sealed container. Rotate the handwheel to push the piston forward, creating a pressure on the oil that is transmitted in all directions in a closed system. Therefore, the pressure entering the standard instrument, calibrated instrument, and standard instrument is equal. Therefore, using the method of comparison, the absolute error of the calibrated instrument can be obtained.
The accuracy of the pressure gauge calibrator mainly depends on the accuracy of precision pressure gauges, ranging from 0.4 to 0.25 levels. High precision requires the use of precision digital pressure gauges, with accuracy levels of 0.05 and 0.02, which can be used to calibrate standard spring tube pressure gauges, transmitters, etc
二、Verification principle
Calibration work is the process of comparing the calibrated instrument with the standard instrument under the same conditions. The selection principle of standard instruments is that when the allowable absolute error of the calibrated instrument is a tolerance, the allowable absolute error of the standard instrument should not exceed a tolerance of 1/3 (preferably not exceeding a tolerance of 1/5). In this way, it can be considered that the reading of the standard instrument is the true value. In addition, to prevent overtravel damage to the standard instrument, the measurement range of the standard instrument should be one level larger than that of the calibrated instrument. If the accuracy level of the calibrated instrument is higher than the indicated level, the instrument is qualified. Otherwise, it should be repaired, replaced, or downgraded for use.
三、Verification content
Verification is divided into on-site verification and laboratory verification. The verification content includes indication value error, variation, and linear adjustment. The specific steps are: first, evenly determine several calibrated points within the range of the calibrated meter (usually 5-6 points, with certain lower and upper limits of the ship's quantity), and then compare the indicated values of the standard meter point by point from small to large (up stroke) until the maximum value. Advance a little further until the pointer slightly exceeds the maximum value, and then perform a verification from large to small (down stroke). Repeat this process 2-3 times, and finally calculate and determine whether the instrument is qualified based on the definition of various technical indicators.

- Market Analysis of Pressure Calibration Benches
With the continuous expansion of market demand, the Pressure gauge calibration table , which is closely related to people's lives, has also developed rapidly. Nowadays, the research field of pressure calibration platforms in various countries around the world is very extensive, almost penetrating into various industries. In the modern society with increasingly fierce information technology competition, strengthening information construction is extremely precious for every industry and enterprise, and this is especially true for the electric pressure calibration industry. Vigorously developing information technology is also crucial for the development of electric pressure testing platforms. Developing and utilizing information resources can enable production and business activities to obtain better development opportunities through timely processing of information.
After the new product of the Pressure gauge calibration table platform is launched, the target group of distributors suitable for oneself will be determined based on the market positioning, product characteristics, channel characteristics, etc. of the product. Pay attention to their long-term development and require dealers to have the ability to operate the market, rather than being able to become distributors of manufacturers as long as they have money. If the local distributor collapses, it represents the loss of the pressure calibration table in the local market, and it is not so easy to re-enter the market. Even if it is caused by personal reasons of the distributor, people often lose confidence in the product due to their lack of truth, making it difficult for manufacturers to develop new distributors. Therefore, for manufacturers, what they lose is not just distributors, but the entire regional market. So in the development of pressure calibration tables, choosing a distributor is crucial.
Market competition, after experiencing resource competition, product quality competition, and product price competition, people are racking their brains for new competitive advantages. Various theories and viewpoints on competitive advantages are constantly emerging: at the regional level, there is mainly competition to absorb capital and expand the demand capacity of market pressure verification stations; At the industrial level, there is mainly competition for industrial adjustment and structural upgrading; At the enterprise level, there is mainly competition for product quality and price of dynamic Pressure gauge calibration table competition for management capabilities, strategic expansion, and diversified competition, among which there is no consensus. However, no matter what kind of competition, tracing back to the source, Zui needs to follow market laws and return to the fundamental determining factor of the market - customer service. Because, thousands of challenges, thousands of challenges, ultimately, are challenges to customer needs; Thousand competitions, ten thousand competitions, ultimately, are the competition for customers. We have long bid farewell to the era of material product scarcity and entered an era of product abundance and oversupply. Customers are no longer satisfied with low-level consumption of clothing, food, housing, and transportation, and are beginning to pursue satisfaction and multi-level value returns in consumption. In short, customer satisfaction service and customer perceived value are the focal points of all market competition.
In the modern business environment, it is an indisputable fact that without products, there is no service. After finding a pressure calibration table distributor, maintenance is necessary, and the maintenance of the distributor is a long-term task. Therefore, it is necessary for manufacturers to cooperate and communicate openly, in order to form a good cooperative relationship. We know that the service industry is a new type of industry developed after agriculture and industry, so it is also called the tertiary industry.If agriculture and industry face competition from nature, then the competition from the service industry is from people. Therefore, to challenge the era of service economy, the first step is to challenge people, customers, and customer satisfaction. Customer satisfaction is the fundamental indicator of a provider's competitiveness. In recent years, the competition in the pressure calibration table market has been fierce, and while expanding the market, we should also explore a suitable after-sales service path for ourselves

- Digital pressure calibrator -Operating Instructions
Digital pressure calibrator is an instrument used for measuring and verifying pressure, widely used in industry, laboratories, and other fields. This operation manual aims to introduce the usage method and precautions of the digital pressure calibrator to users, in order to ensure correct operation and accurate measurement. Please read the following article carefully.
Product Overview:
The digital pressure calibrator is a precision instrument that uses advanced sensing technology and a digital display screen to quickly and accurately measure pressure values. Its main characteristics are as follows:
1. High precision: The digital pressure calibrator has high-precision measurement capabilities, which can meet various types of pressure force measurement requirements.
2. Easy to operate: The instrument is easy to operate, and users only need to follow this manual to operate.
3. Multifunctional: The digital pressure calibrator has multiple measurement modes and unit options, which can adapt to different application scenarios.
4. Data recording: The instrument can record measurement data and support data export and printing.
Operating Steps:
1. Instrument connection: Connect the digital pressure calibrator to the measured pressure device to ensure connection Stable and reliable connection.
2. Turn on the power: Insert the power cord and turn on the power switch. After the instrument is started, enter Standby mode.
3. Select measurement mode: Select the appropriate measurement mode according to the characteristics of the pressure device being measured, such as pressure sensors, pressure gauges, etc.
4. Set measurement unit: Select appropriate pressure units as needed, such as Pascal (Pa) Bar, kPa, etc.
5. Start measurement: Press the measurement button, the digital pressure calibrator will start measuring and complete the measurement The results are displayed on the digital display screen.
6. Record data: Users can record measurement results as needed, and the instrument will also automatically Dynamic recording data.
7. End measurement: After the measurement is completed, press the stop button and the digital pressure calibrator will stop Measure and retain the last measurement result.
8. Turn off the power: After the measurement is completed, turn off the power switch in a timely manner and unplug the power cord.
Precautions:
1. Operating environment: The digital pressure calibrator should be in a dry, non corrosive indoor environment Used in, to avoid the influence of moisture and corrosive substances.
2. Avoid vibration: During use, severe vibration and collision should be avoided to avoid affecting measurement accuracy degree and instrument lifespan.
3. Regular calibration: To ensure the accuracy of measurement, it is recommended to regularly calibrate the digital pressure calibrator Perform calibration to avoid error accumulation.
4. Protective measures: During use, attention should be paid to preventing the instrument from being impacted by excessive pressure, To avoid damage to the sensor and instrument itself.
5. Cleaning and maintenance: Regularly clean the instrument casing and maintain good ventilation of the instrument to avoid dust dust and impurities enter the interior of the instrument.
The digital pressure calibrator is a powerful and easy to operate instrument. Through this operating manual, users can learn about the usage methods and precautions of the digital pressure calibrator. Correctly operating a digital pressure calibrator can accurately measure pressure values, improve work efficiency, and ensure product quality. I hope this manual can be helpful for users' work and learning. If you have any questions, please contact after-sales service promptly. - Differential Pressure Transmitter Applied in Oilfield Single Well Oil Extraction
Background
When the oil is discharged from a single well in an oil field, the extracted crude oil contains water, and the water content is not fixed which results in inaccurate measurement for the crude oil density in the process of measuring crude oil nuclear production.
In order to solve it, the automatic intelligent analytical analysis and treatment is applied for the dissolved gas contained in crude oil in the metering pipeline. The density of the mixed gas mixture can be accurately determined without separation, without degassing, thereby realizing accurate measurement of crude oil production.

Difficulties
(1) The measuring medium is an oil-water mixture with high temperature, high viscosity and it has certain corrosiveness.
(2) 0.5% FS accuracy, good stability
Solution
MDM3051K-LP series differential pressure transmitter, with a double flange capillary tube, can reduce the interference caused by high viscosity, high temperature, and corrosive of the medium. It is suitable for differential pressure measurement in a closed environment.
Details:
(1) P = ρgh, the principle to calculate the crude oil density value.
(2) Measuring the differential pressure value on a vertical fixed length pipe to reduce the influence of high viscosity and high temperature of the medium.
(3) The measurement range needs to match the fixed pipe length.
(4) 0.5% FS accuracy.

After testing the pipeline valves and various components, the measurement data is accurate, and the effect is achieved onsite.
Product

